Figma Integration Guide for VectoUI Unity
Learn how to connect Figma to the VectoUI Unity plugin, configure a Personal Access Token and Team ID, and generate Unity UI Prefabs from Figma design files.
Figma Integration Guide for VectoUI Unity
This guide explains how to connect a Figma account to the VectoUI Unity plugin and configure the required Figma Token and Team ID.
Prerequisites
Before configuring Figma, make sure that:
- The VectoUI plugin is installed in the Unity project.
- The current Figma account can access the target team, project, and design file.
- The target design file is stored in a team project so the plugin can load projects and files through the
Team ID.
Account Settings
(1) Select the Data Source
Open the VectoUI settings window from the Unity menu and go to Settings / Account.
Select Figma from the Data Source dropdown.
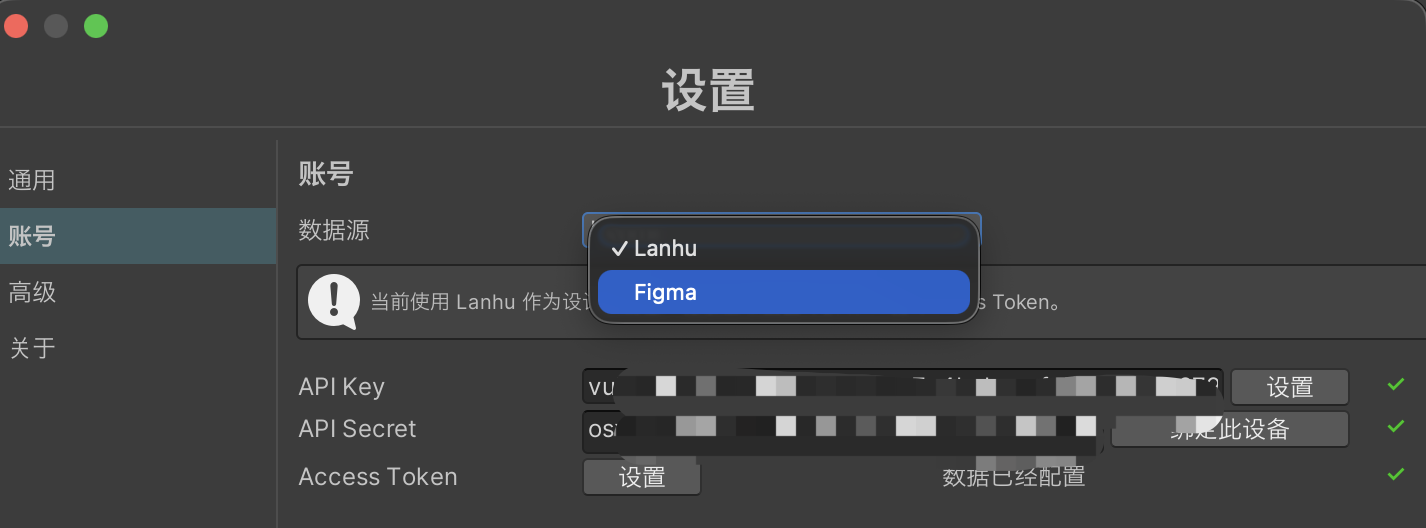
The page will display the Figma account settings. Configure the following fields:
Figma TokenFigma Team IDs
(2) Configure the Figma Token
Figma Token
The Figma Token is a Personal Access Token for the Figma account. It authorizes the plugin to read Figma teams, projects, and design files.
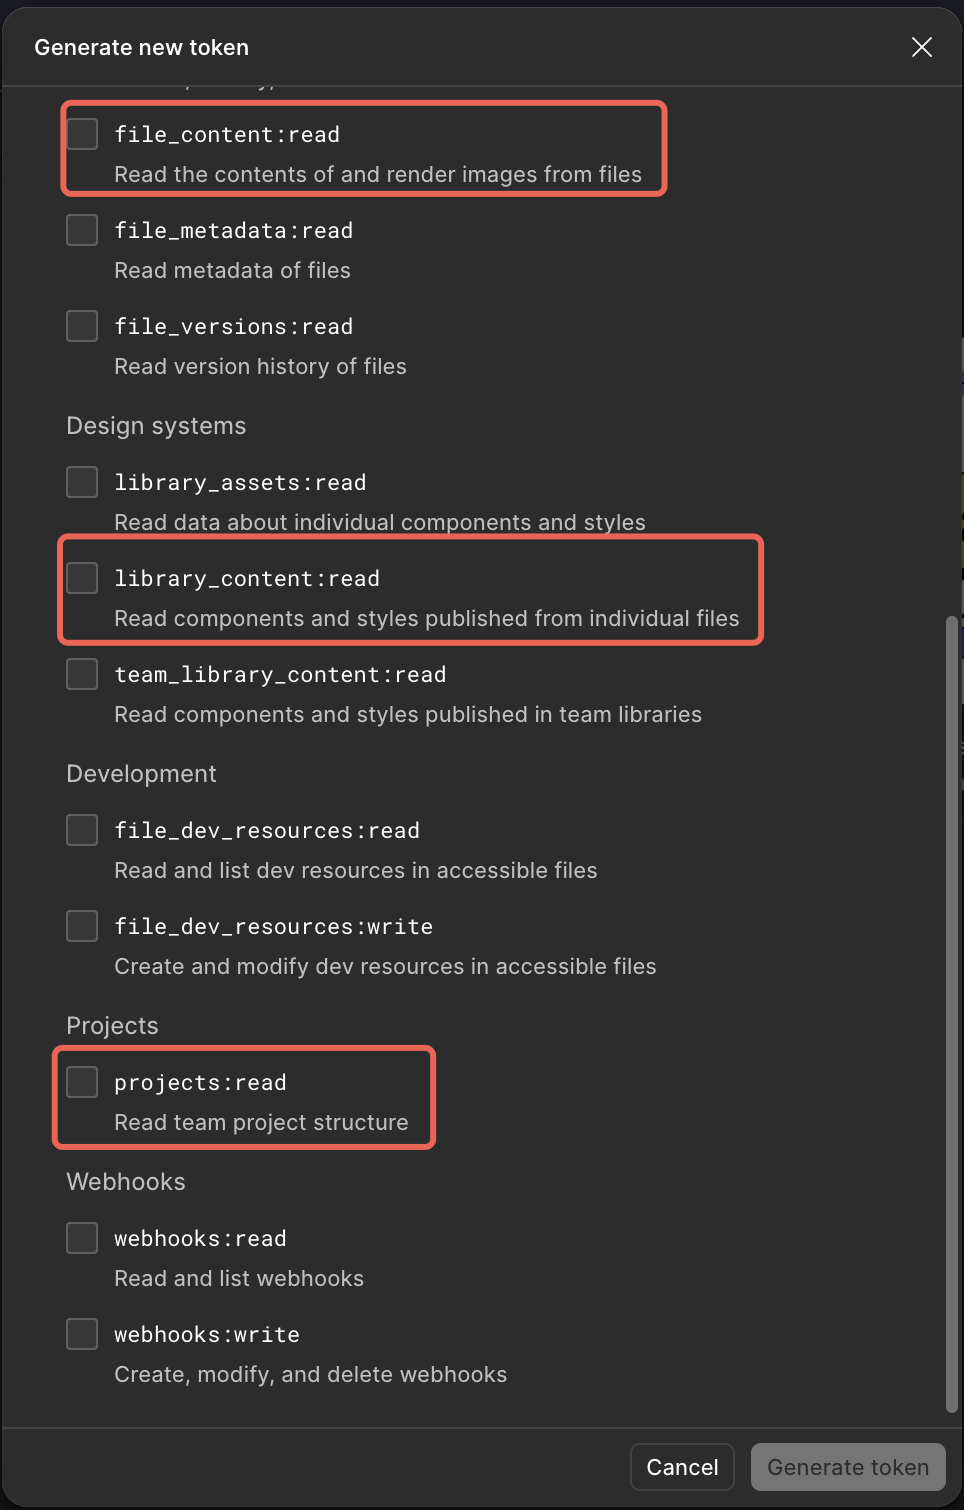
Create a Personal Access Token from the Figma account settings page.
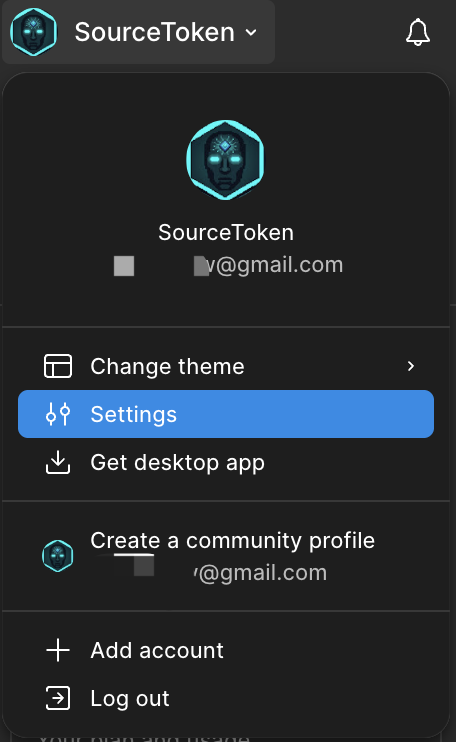
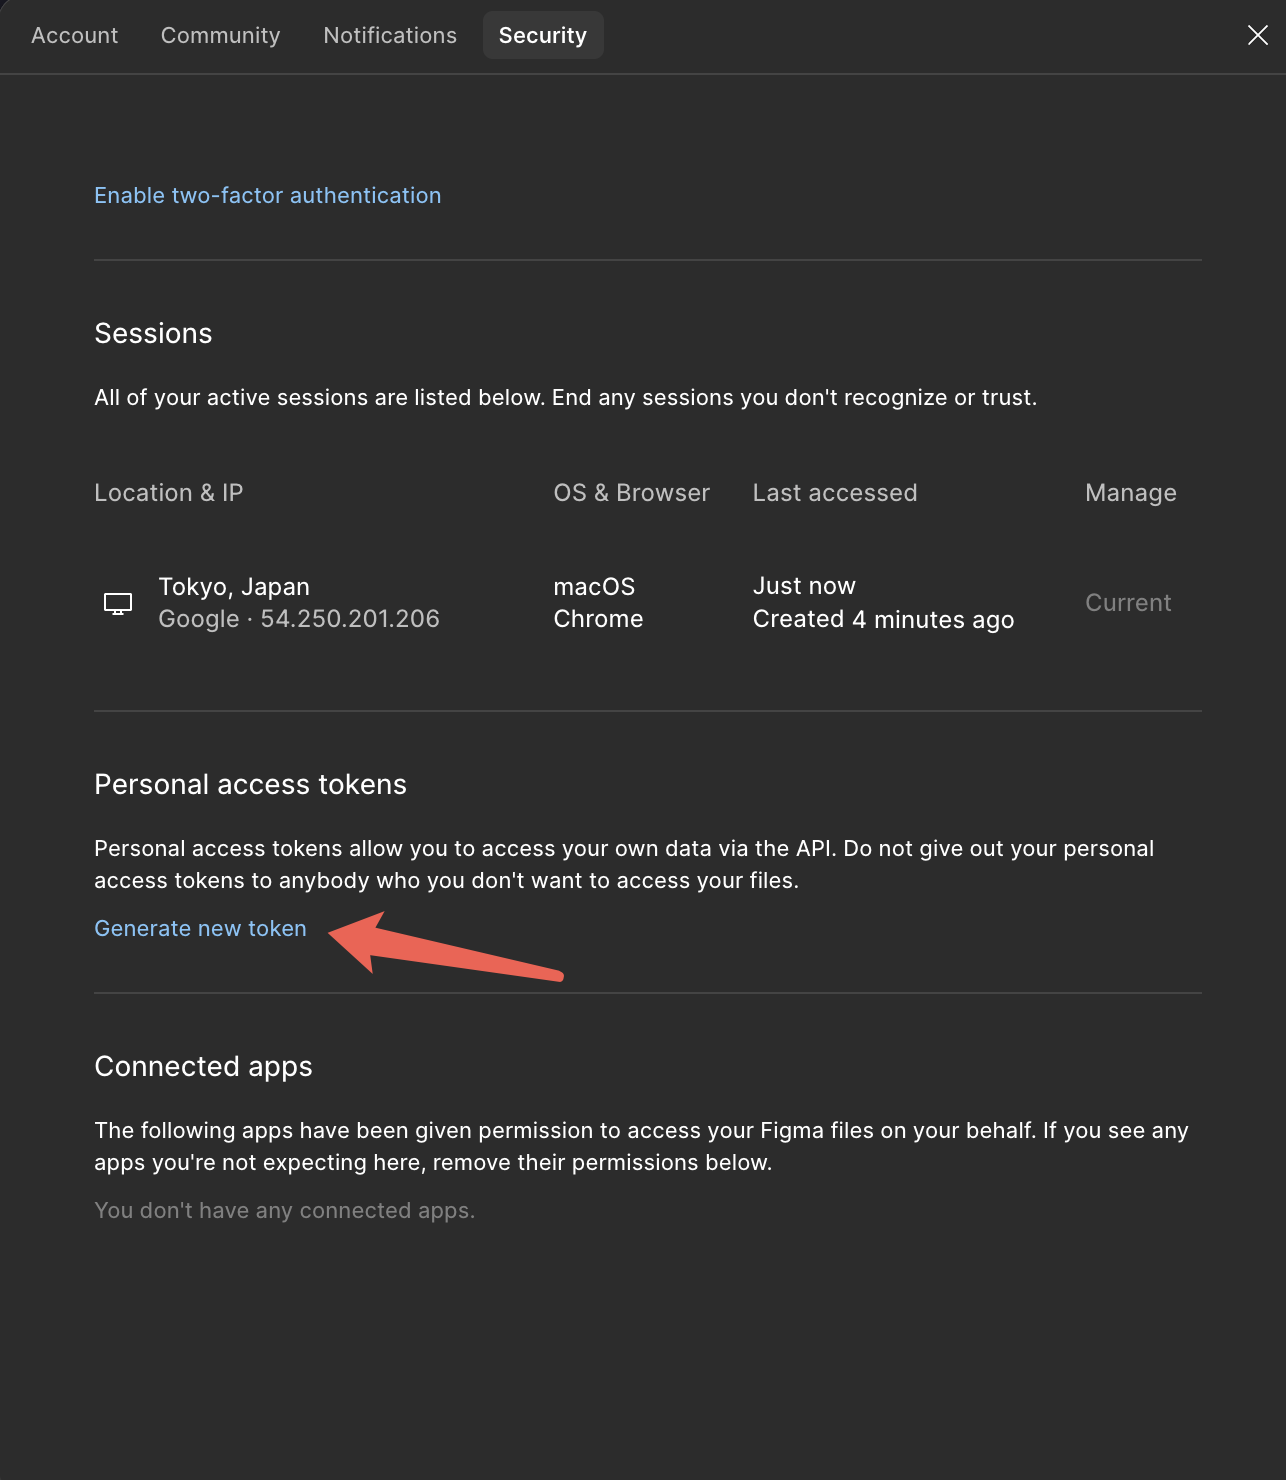
Make sure the token includes the following permissions:
current_user:readfile_content:readprojects:readlibrary_content:read
Choose an expiration period that matches the project development cycle.
Note: The Access Token is displayed only once after it is generated. Store it securely before leaving the page.
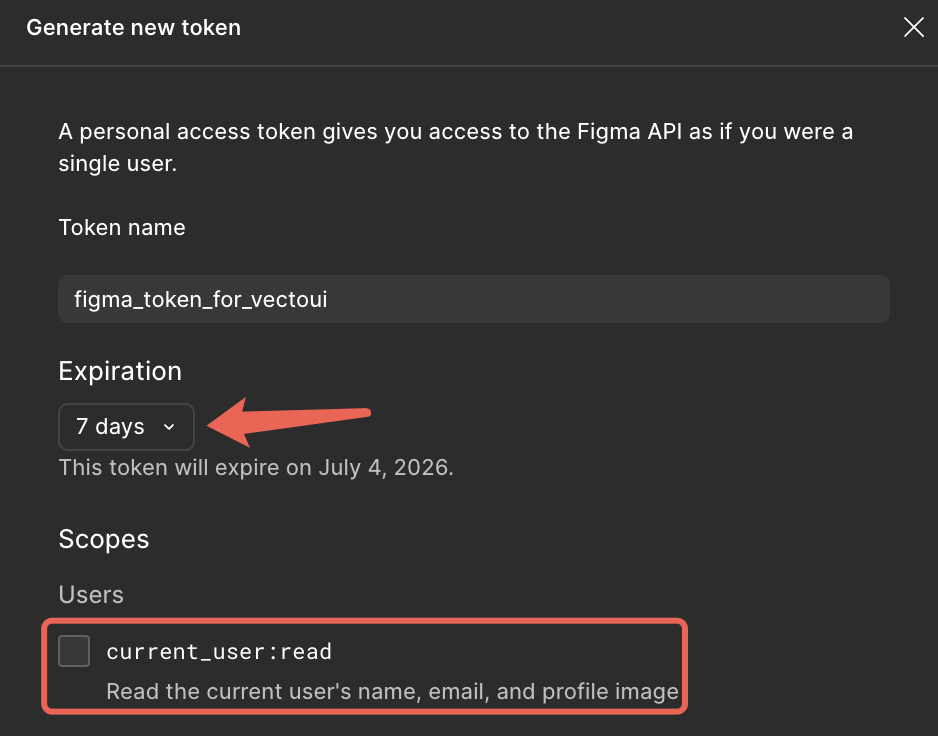
Return to Settings / Account in the plugin, enter the token in the Figma Token field, and click Set to save it.
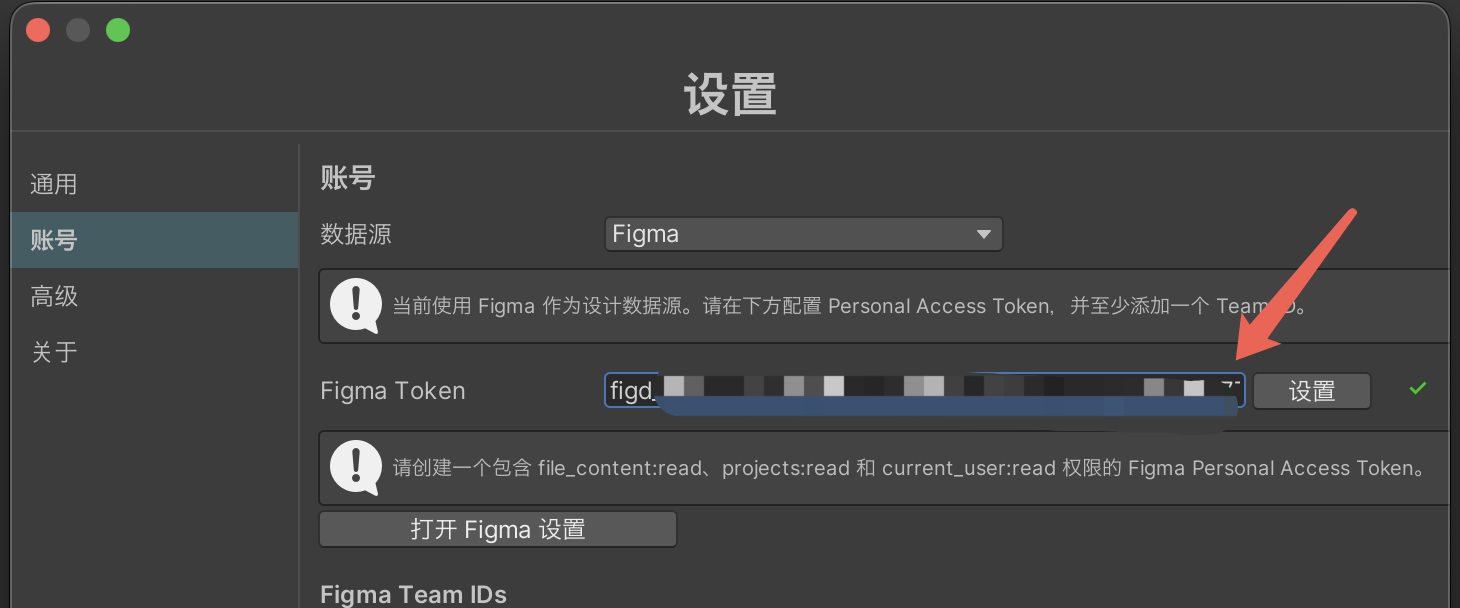
After the token is saved successfully, a check mark appears beside the input field.
(3) Configure the Figma Team ID
Team ID
The Figma API cannot reliably retrieve the complete team list for an individual account, so each Team ID must be configured manually.
The Team ID is available in the team URL on the Figma website.
Open the target team and copy the URL from the browser address bar.
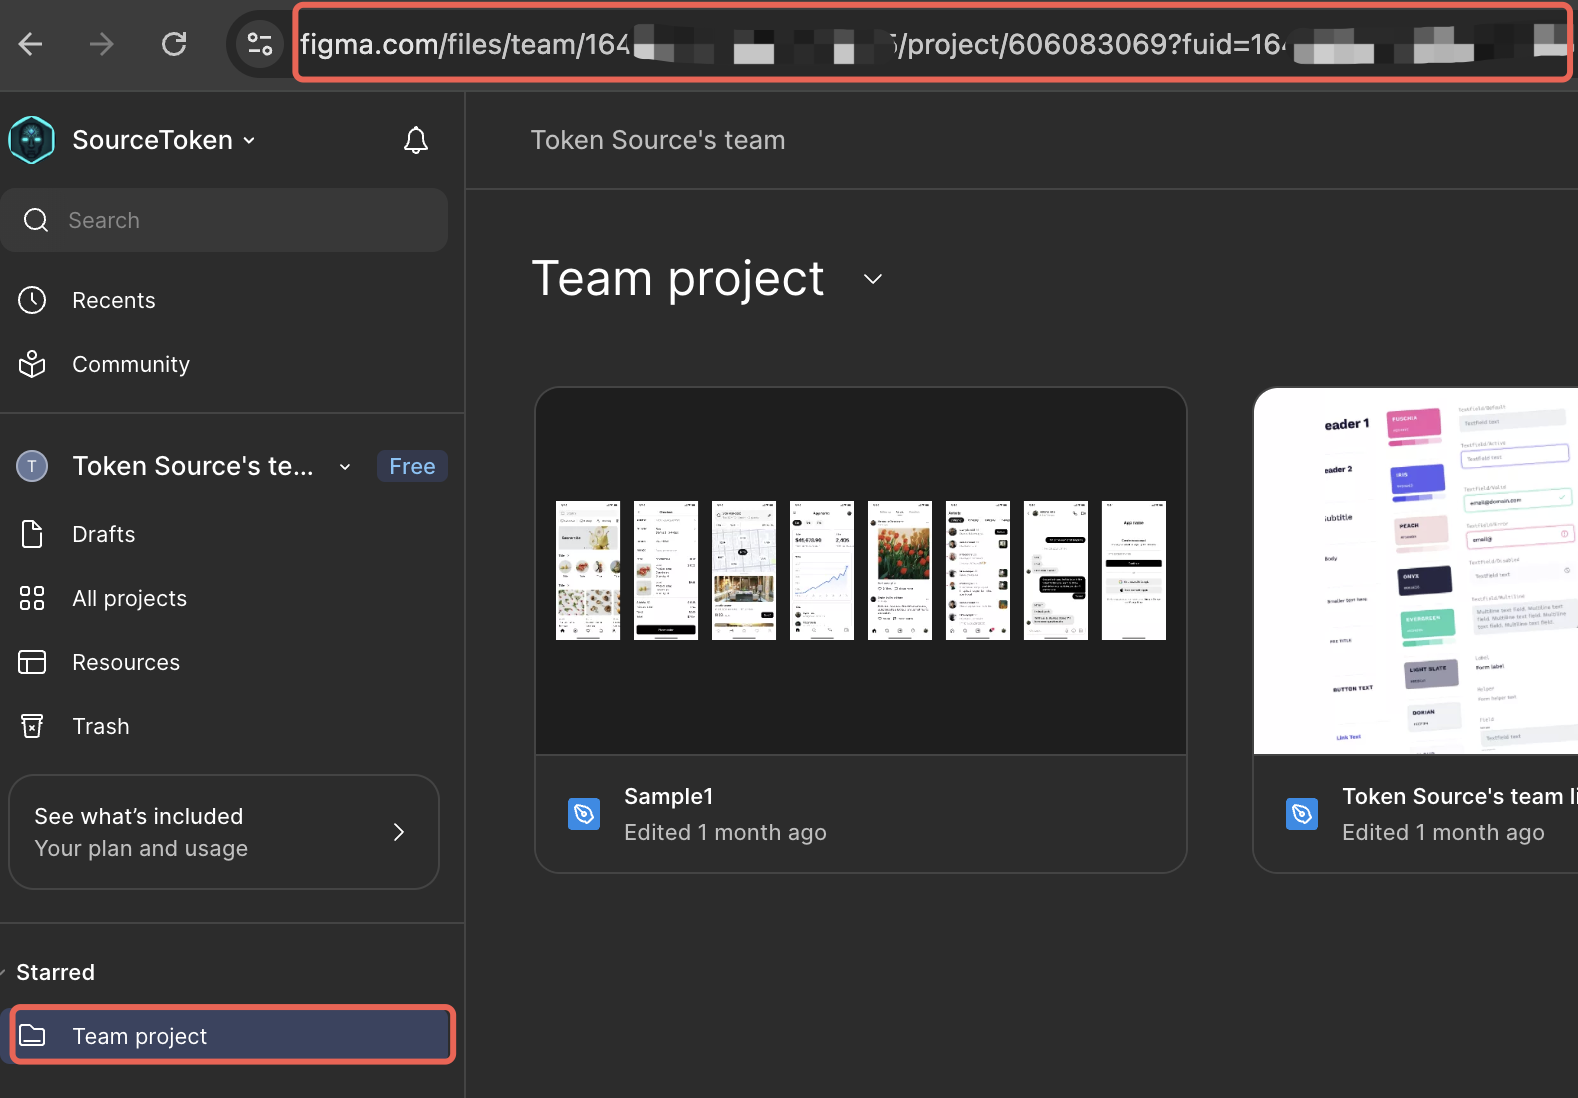
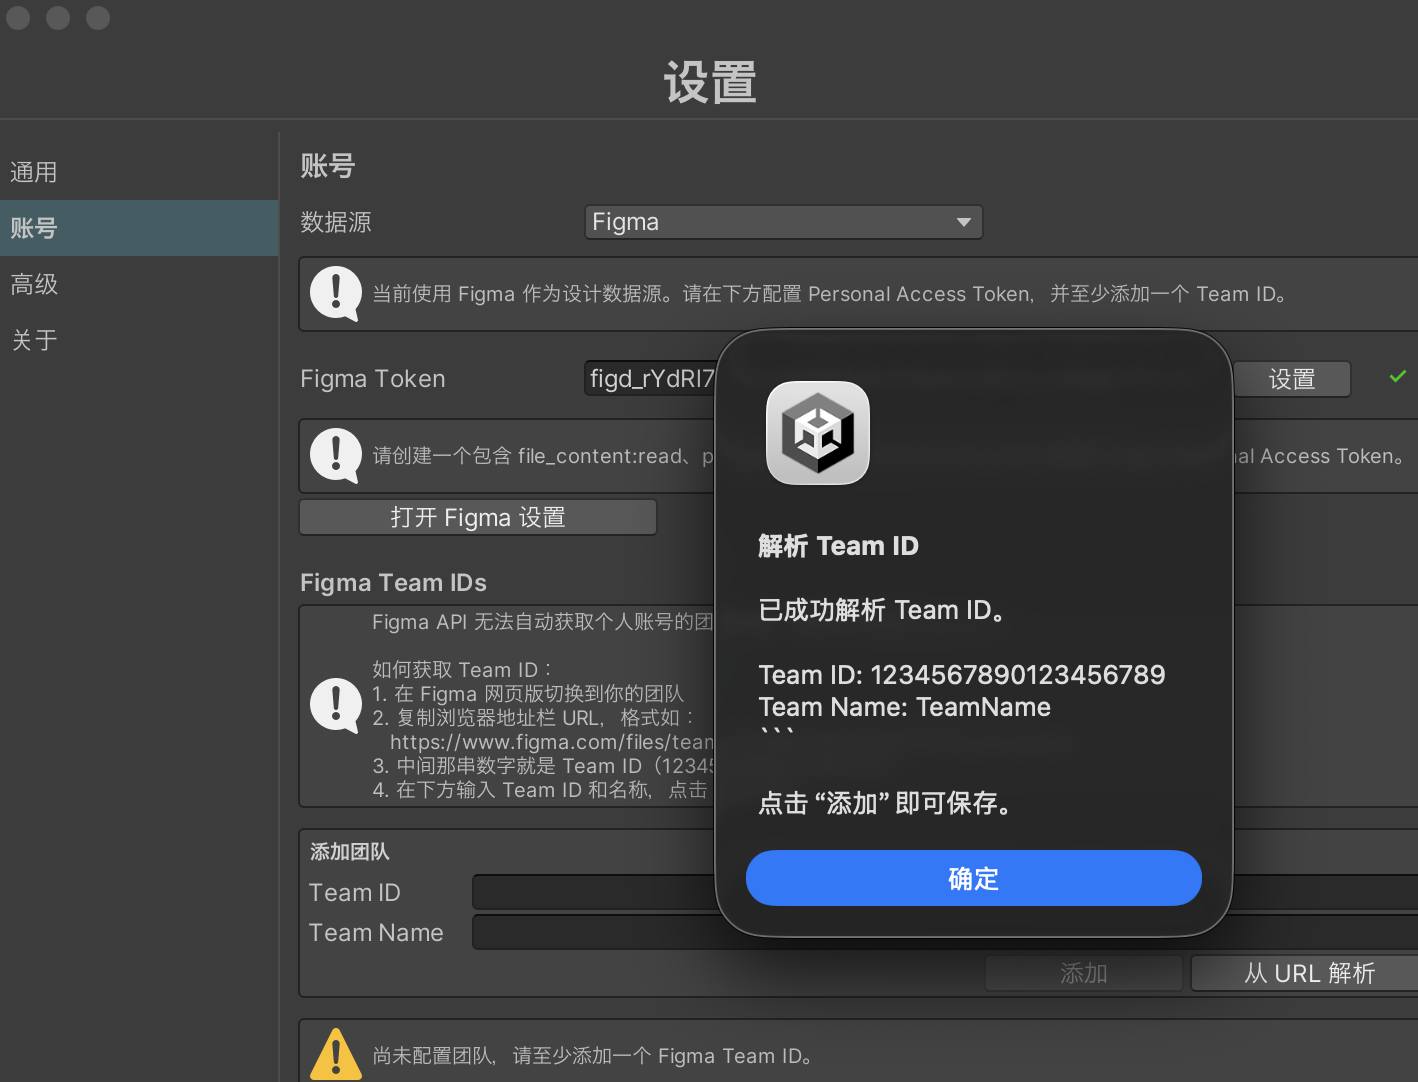
Parse the Team ID from a URL
Copy the team URL from the browser, then click Parse from URL in VectoUI. The plugin will extract the team information automatically.
Click Add Team. The team will appear in the Configured Teams list.
Enter the Team ID Manually
If the URL cannot be parsed, enter the team information manually.
https://www.figma.com/files/team/1234567890123456789/TeamName
In this example, 1234567890123456789 is the Team ID.
In the Figma Team IDs section of the plugin, enter:
Team ID: The numeric ID copied from the URL.Team Name: A recognizable name for the team.
Click Add Team. The team will appear in the Configured Teams list.
Generate a Unity UI Prefab
After configuring the Figma Token and at least one Team ID, return to the VectoUI conversion window and refresh the team list.
The plugin loads Figma data in the following order:
- Loads team projects from the configured
Team ID. - Loads the Figma files in the selected project.
- Generates the corresponding Unity UI Prefab from the selected design file.
Find the target Figma design file and click Generate Prefab to generate the corresponding Unity UI Prefab.
Troubleshooting
The Token Does Not Work
Check whether the Figma Token is still valid and whether it includes the following permissions:
file_content:readprojects:readcurrent_user:read
If the token has been deleted, has expired, or does not have the required permissions, create a new token in the Figma account settings and click Set in the plugin to save it.
The Team or Project List Is Empty
Check that:
- The
Team IDcomes from the target team URL. - The current Figma account is a member of the team.
- The account associated with the token can access the projects and files in that team.
If the team URL was copied incorrectly, copy it again from the Figma website and use Parse from URL or enter the team information manually.
The Design File Cannot Be Generated
Confirm that the target file opens correctly on the Figma website and that the account associated with the token has permission to access it.
If the plugin reports a failed Figma request, use the HTTP status code or Figma response to identify the cause:
401: The token is invalid or was not accepted by Figma.403: The token is valid, but the account cannot access the team, project, or file.404: The file cannot be found with the current token.429: The Figma API rate limit has been reached. Try again later.
API Access Is Limited
Figma applies API request limits to Personal Access Tokens, including tokens created by paid accounts. Choose a token expiration period that matches the project cycle. After the token expires, create a new token and update the plugin configuration.
End of guide