VectoUI Unity Converter Integration Guide
This guide explains how to quickly integrate and use the VectoUI Unity UI conversion plugin.
Plugin Overview
This plugin is VectoUI's automated UI compilation plugin for the Unity3D Engine.
It can parse design files from mainstream cloud-based design collaboration platforms, such as Lanhu and Figma, and convert them into ready-to-use Unity Prefab components with one click.
Integration
Unity Plugin Integration
Visit one of the plugin repositories for the latest information:
(1) Install through Manifest.json
In the Unity project, add the following configuration to Packages/manifest.json to include the plugin. This method assumes that SSH key authentication is already configured.
manifest.json
{
  "dependencies": {
    "com.vectoui.unity.convertor": "git@github.com:vecto-ui/com.vectoui.unity.convertor.git"
  }
}
(2) Install from a Git URL
In the Unity Editor menu, select Window > Package Manager. Click the + button in the upper-left corner and choose Install package from git URL ....
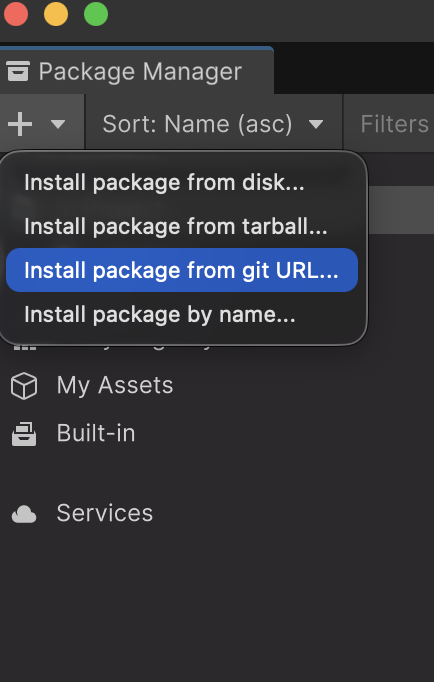
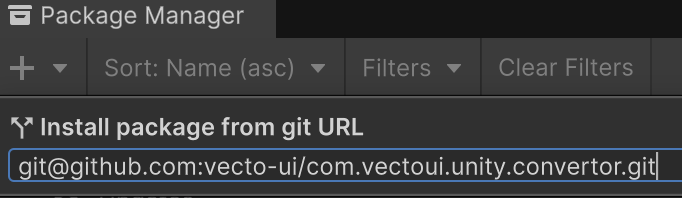
Enter the following repository URL and click Install:
git@github.com:vecto-ui/com.vectoui.unity.convertor.git
Basic Usage
(1) Application Authorization Notice
The first time you open the plugin in Unity, a data access and disclaimer notice appears. Read it carefully and click [I agree and accept the corresponding responsibilities] to unlock all features.
(2) Account and Permission Settings
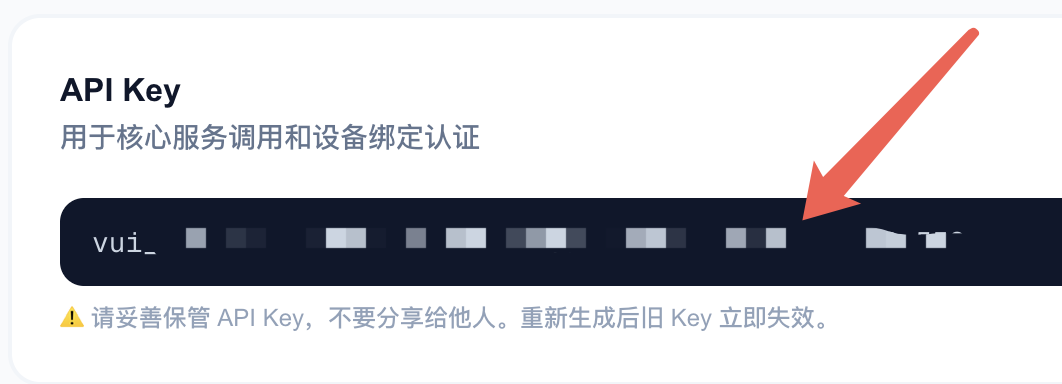
API Key (VectoUI Platform Verification)
Open the plugin's Settings / Account page and enter your API Key first.
The API Key verifies your VectoUI subscription entitlement. You can obtain it from the Dashboard on the VectoUI website.
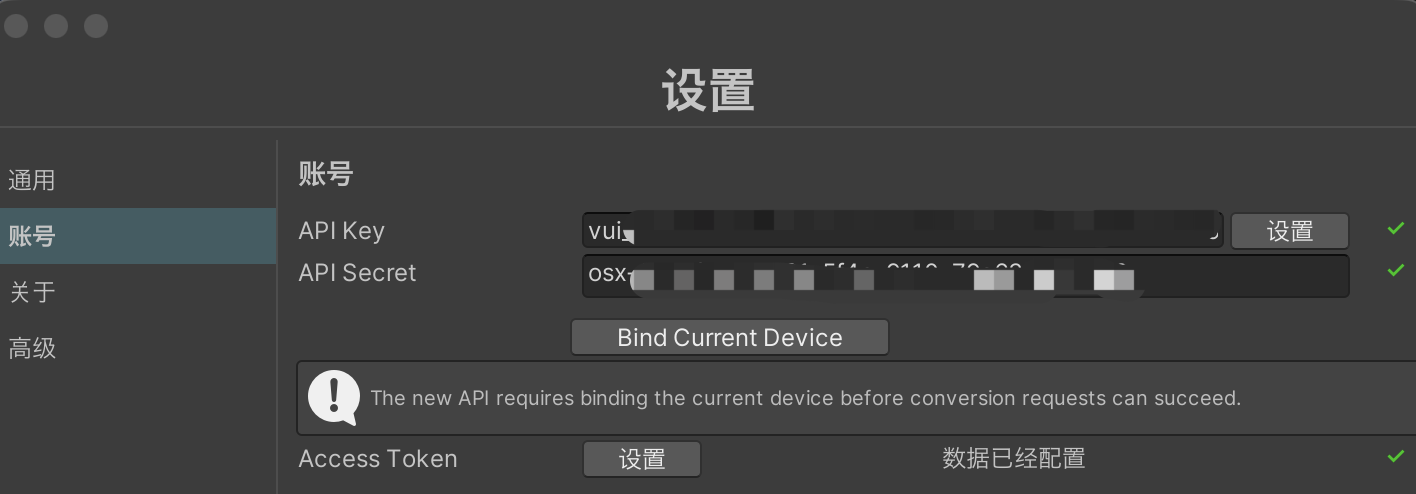
After entering the key, click Bind Current Device to complete the binding.
Access Token (Third-Party Data Source Authorization)
The Access Token is the legal credential used to access data from the corresponding third-party design platform. As a neutral engine, VectoUI does not provide third-party data scraping. You must obtain credentials for a platform that you are legally authorized to access and enter them here.
For instructions on safely obtaining your local credentials, see the prerequisites guide.
(3) Generate UI Components
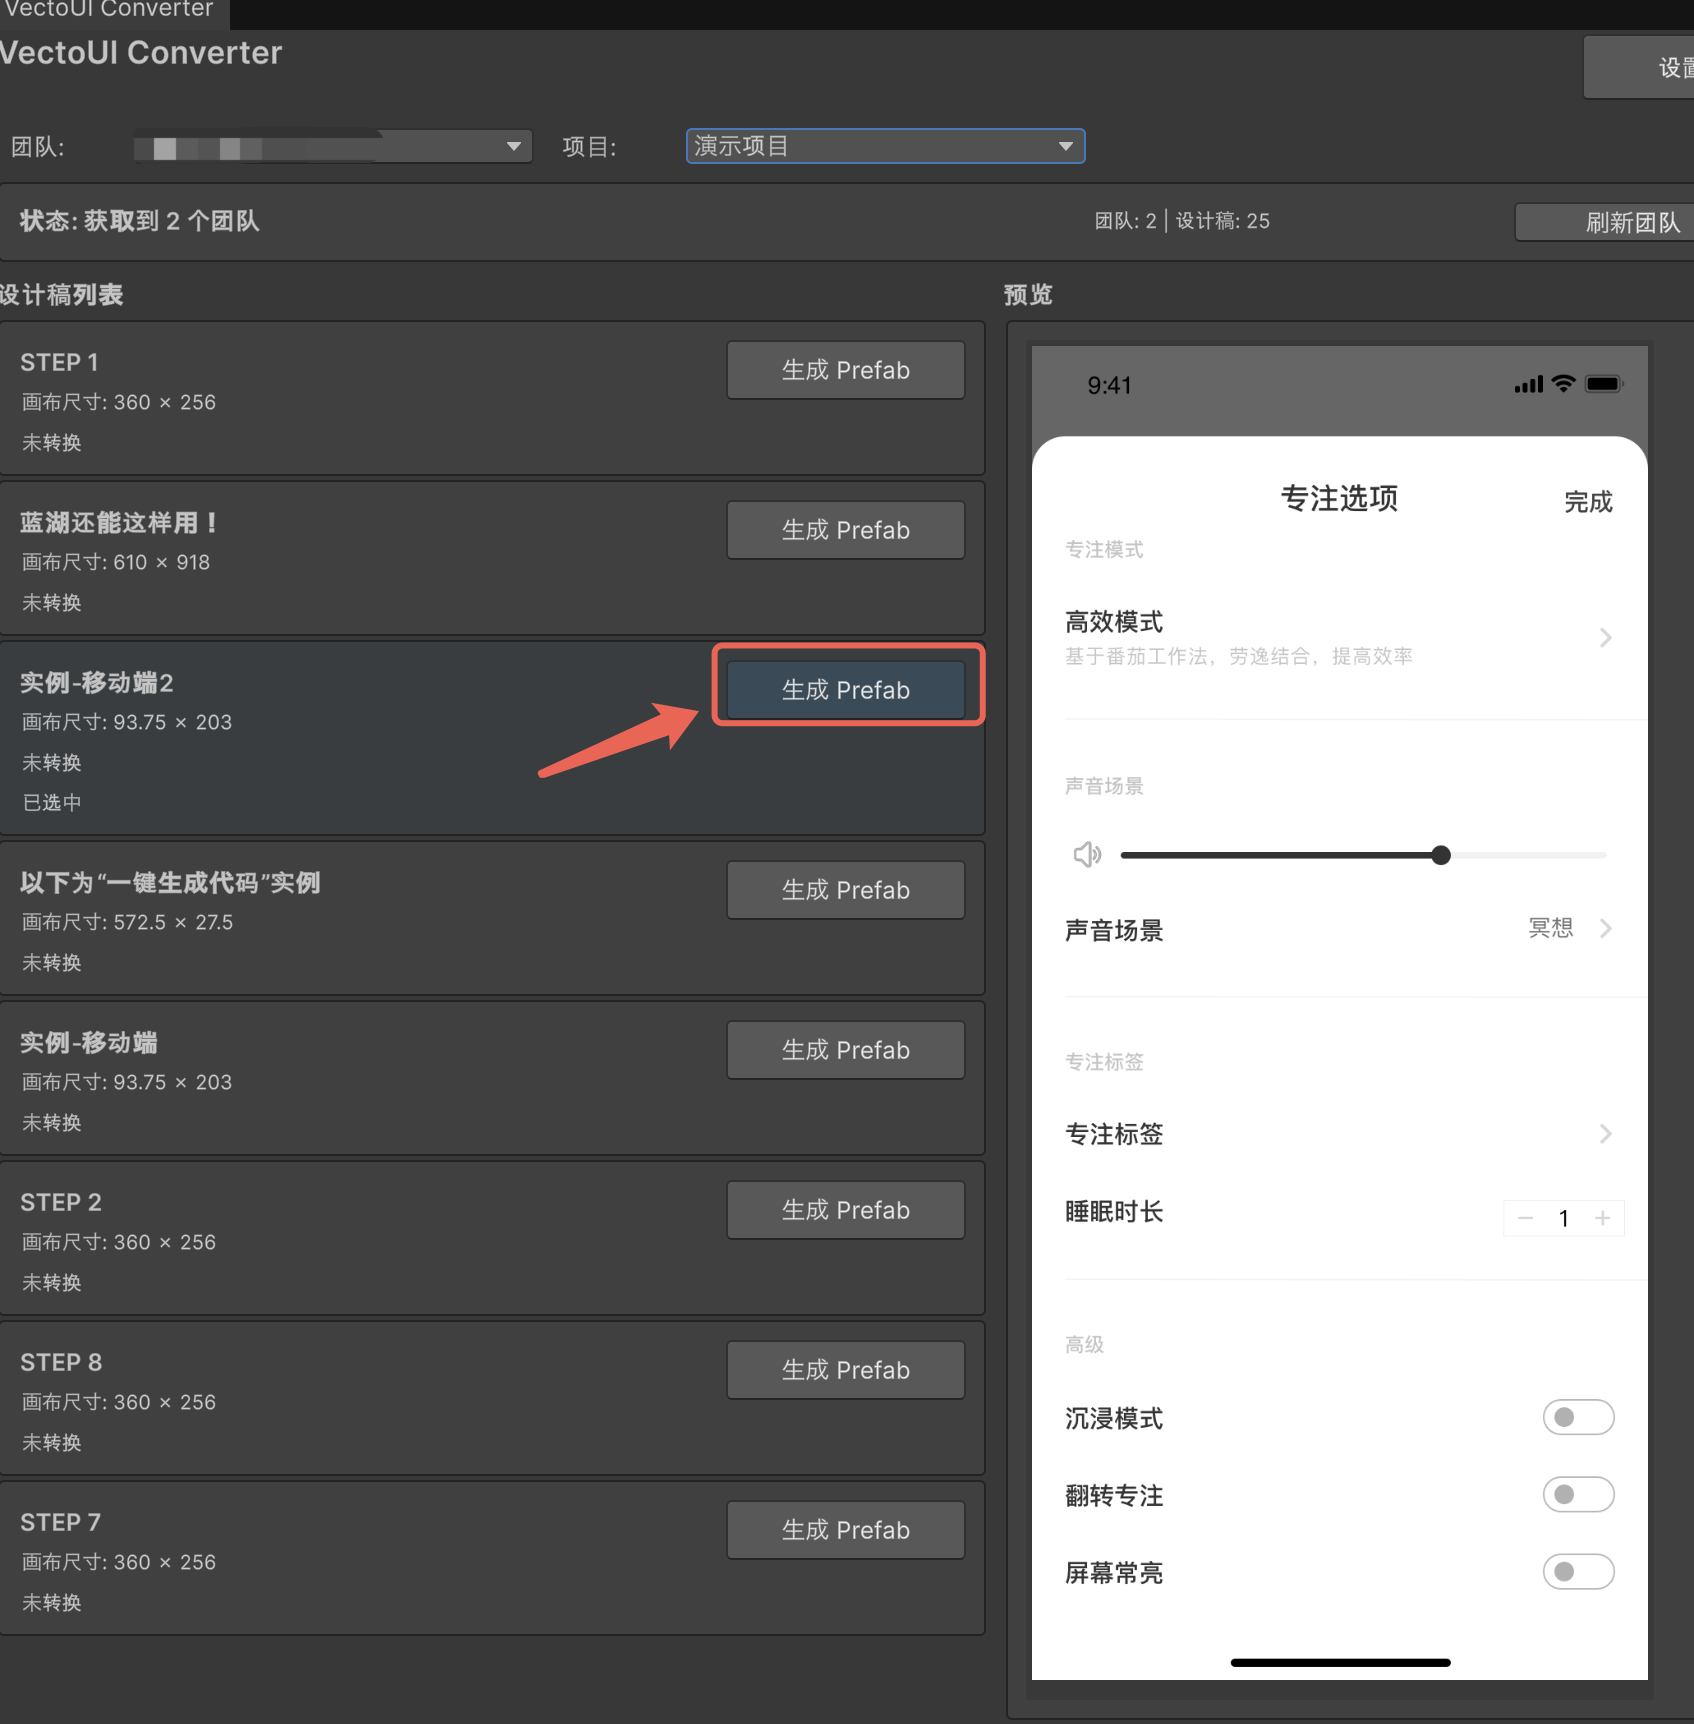
After the authentication information is configured successfully, refresh the plugin to load online projects and artboards.
Find the UI screen you want to generate and click Generate Prefab. The VectoUI engine will parse the design and generate the Prefab locally.
Art Production Guidelines
To generate well-structured components without additional manual adjustment, the art team should follow the standardized VectoUI guidelines when preparing design files:
(4) Common Configuration Options
- Font path: Projects often use many custom fonts. Configure the relative font asset path under
Settings / General / Font Path. During conversion, the plugin searches this path and maps matching fonts to generated text components automatically. - TextMeshPro support: TextMeshPro components are fully supported. Enable
Settings / General / Enable TextMeshProto apply TMP globally. - Layer settings: Configure the Layer assigned to generated components and all child nodes. The default is the
UIlayer. - Text effect behavior: Different teams have different performance requirements and implementation strategies for text
OutlineandShadoweffects. To avoid the additional performance cost of default UGUI effect scripts, the plugin does not convert text effects by default. Use the post-processing workflow below when custom component extensions are required.
Advanced Usage
Automatic Component Binding Rules
The plugin provides automatic component binding based on regular-expression matching of node names. It can automatically attach core UGUI components such as Button, Canvas, and ScrollRect according to naming rules.
- Enable
Generate Binding ClassunderSettings / Advanced. - The plugin generates a VectoUI component binding rule asset at
Assets/VectoUI/Editor/VectoUIAssetBindeRule.assetby default. - The rule asset includes default component name and binding mappings. You can modify them or add custom regular expressions for additional components.
Custom script binding: To attach a project-specific logic script through a binding rule, set
Bind Typeto Custom. The custom script must inherit fromMonoBehaviour.
Custom Post-Processing Workflow
If regular-expression binding rules cannot cover complex business requirements, the plugin exposes the IVectoUINodePostProcess interface for injecting custom post-processing logic into the build pipeline.
Whenever VectoUI generates a node in the Prefab, it calls OnNodePostBuild and passes the node's GameObject reference together with the related AST data. You can use this information to modify node properties or attach more complex logic.
Post-processing example:
using UnityEngine;
using VectoUI.Builder;

namespace Game.Editor
{
    // Implement a custom node post-processing interface.
    public class CustomNodePostProcess: IVectoUINodePostProcess
    {
        public void OnNodePostBuild(VectoUIPostNodeInfo nodeInfo)
        {
            Debug.Log($"OnNodePostBuild: {nodeInfo.NodeName}  Type: {nodeInfo.LayerType}");

            if (nodeInfo.LayerType == "textLayer")
            {
                // Add a shared prefix to every text node.
                nodeInfo.GameObject.name = $"txt_{nodeInfo.GameObject.name}";
            }
            else if (nodeInfo.LayerType == "shape")
            {
                // Rename shape nodes so other custom binding rules, such as
                // a regular expression matching `ic_*`, can capture them.
                nodeInfo.GameObject.name = $"ic_{nodeInfo.GameObject.name}";
            }

            // Print the node's original JSON data for debugging and analysis.
            Debug.Log($"RawJson: {nodeInfo.RawJson}");
        }
    }
}