VectoUI Unity Converter Advanced Usage Guide
Advanced VectoUI Unity Converter usage, including component binding, post-build processing, and image deduplication.
Advanced Plugin Usage
This guide introduces advanced VectoUI usage through practical examples, helping developers use the VectoUI plugin to improve UI development workflows in Unity3D projects.
Art Production Guidelines
For more stable component generation results, artists should follow these guidelines in the corresponding design tools:
VectoUI also supports commonly used naming keywords. These keywords help developers use VectoUI components and tools more efficiently in production projects.
| Node prefix | Meaning | Notes |
|---|---|---|
| btn_ | Button component | Apply it to the button background layer or node. |
| button_ | Button component | Apply it to the button background layer or node. |
| txt_ | Text component | |
| ic_ | Icon component | |
| icon_ | Icon component | |
| img_ | Image or graphic component | |
| group_ | Group or container | Commonly used for group folders or container parent nodes. |
| canvas_ | Canvas component | Use when the layer requires an additional Canvas component. |
VectoUI Component Binding Tool
The Component Binding Tool is a lightweight script attachment tool.
During Prefab generation, it automatically attaches components according to the keywords and binding rules matched by each node.
The default rules mainly cover common UGUI components. Teams can also bind project-specific custom components.
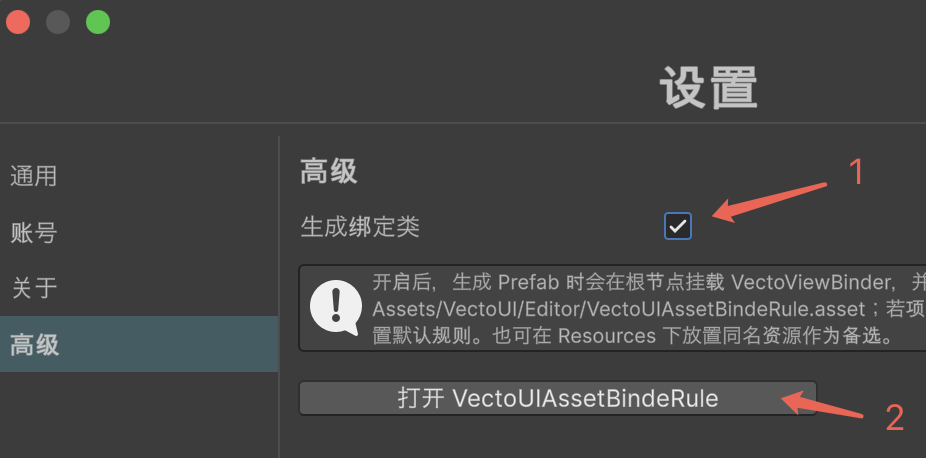
- [1] Enable the component binding switch.
- [2] Open the binding rules.
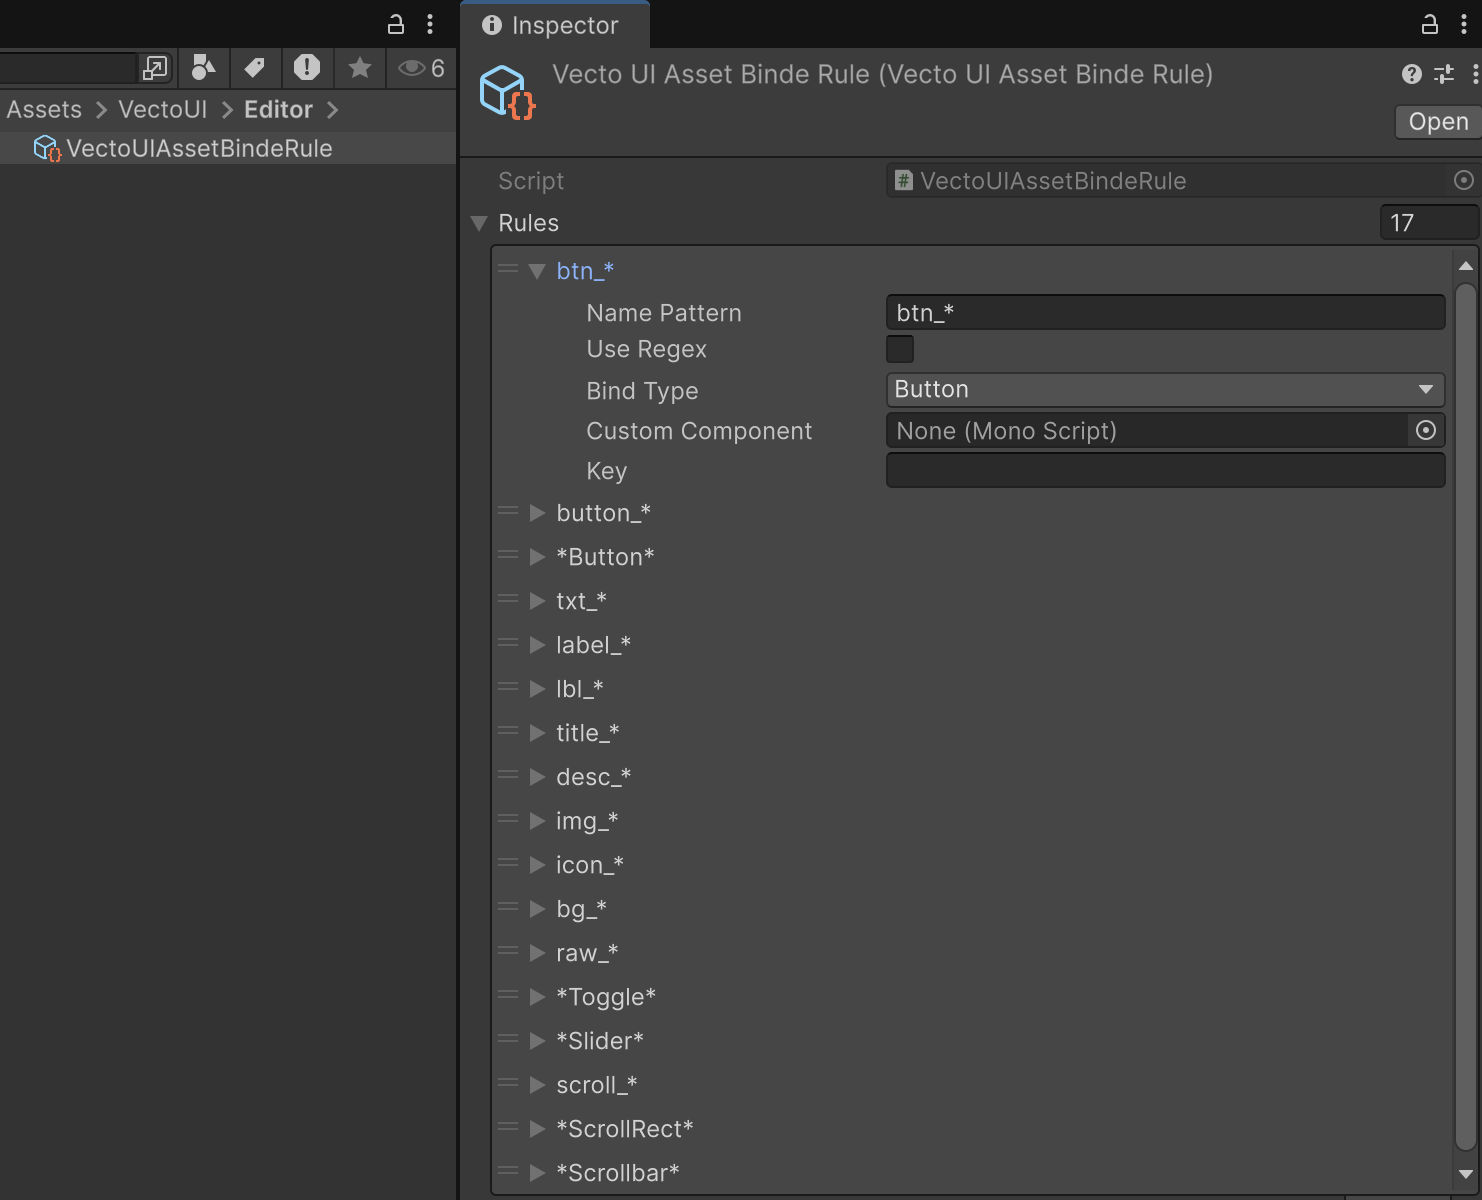
- [3] The binding rules panel includes a set of default matching rules. The project team can keep or modify them as needed.
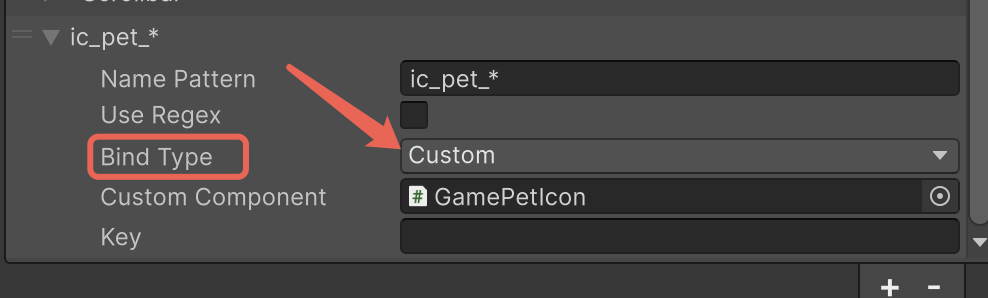
- [4] The binding rules can be extended. To bind a custom component, set the binding type to
Custom:
using UnityEngine;
using UnityEngine.UI;

public class GamePetIcon : MonoBehaviour
{
    void Start()
    {
        var img = GetComponent<Image>();
        img.sprite = Resources.Load<Sprite>("icons/pet_icon");
        // TODO: Add the corresponding project logic.
    }
}
Usage Notes
- The Component Binding Tool is intended for relatively simple binding requirements, such as attaching standard
UGUIcomponents or project-specific effect components includingEffectFadeIn,DotweenAnimator, andCustomButtonto designated nodes. - Artists should avoid adding these keywords to unrelated node or component names, because unintended matches may cause parsing errors.
- For more complex requirements, such as setting properties, changing node alignment, adjusting hierarchy, injecting external references, or dynamically generating and attaching a group of Prefabs under a node, use the post-build workflow described below.
VectoUI Post-Build Workflow
The post-build workflow supports complex project-specific requirements during node and component generation.
It provides a flexible extension mechanism for experienced developers, allowing each team to implement component generation logic that matches its project requirements.
You can implement custom node post-processing through the IVectoUINodePostProcess interface.
Usage
Under any Editor directory in the project, add a class that implements IVectoUINodePostProcess and provide the corresponding interface method:
public void OnNodePostBuild(VectoUIPostNodeInfo nodeInfo)
During VectoUI Prefab generation, every generated node is passed to all classes that implement IVectoUINodePostProcess in sequence. Each class receives the current node information and can perform custom processing.
The following example demonstrates this workflow.
Practical Example
When implementing a Popup screen with VectoUI, the project team finds that the generated Text effect does not match the intended visual result. Custom post-processing can be added after generation to meet the visual requirements.
The following script is a project-specific post-processing workflow that applies automated adjustments and component configuration to TMP text:
// Project-specific VectoUI node post-processing logic.
public class CustomVectoUIPostProcess: IVectoUINodePostProcess
{
    public static bool enablePostProcess = true;

    public void OnNodePostBuild(VectoUIPostNodeInfo nodeInfo)
    {
        // Tool enable switch.
        if(!enablePostProcess)
            return;

        // Node naming agreed upon in the art production guidelines.
        if (nodeInfo.GameObject.name.StartsWith("txt_"))
        {
            Debug.Log($"=== Fix text bounds: {nodeInfo.GameObject.name}");

            // Let custom logic take over text boundary adjustment.
            nodeInfo.SkipDefaultTextBoundsAdjustment = true;

            // Find the TMP text component.
            var tmpText = nodeInfo.GameObject.GetComponent<TMP_Text>();
            if (tmpText != null)
            {
                // Disable raycast handling on the text component.
                tmpText.raycastTarget = false;

                // Use a bold font style.
                tmpText.fontStyle = FontStyles.Bold;

                // Assign a TMP font effect material.
                var mat = AssetDatabase.LoadAssetAtPath<Material>("Assets/Fonts/Arial_TMP/Arial - Regular Material - OL.mat");
                tmpText.fontMaterial = mat;

                // Stretch the text node to fill its parent.
                var rc = nodeInfo.GameObject.GetComponent<RectTransform>();
                if (rc != null)
                {
                    rc.SetToFullStretch();
                    // This uses the VectoUI convenience API and is equivalent to:
                    // rc.anchorMin = Vector2.zero;
                    // rc.anchorMax = Vector2.one;
                    // rc.anchoredPosition = Vector2.zero;
                    // rc.sizeDelta = Vector2.zero;
                    // rc.offsetMin = Vector2.zero;
                    // rc.offsetMax = Vector2.zero;
                }
            }
        }

        // Other project-specific logic...
    }
}
Usage Notes
- After a project implements
IVectoUINodePostProcess, the logic continues to run during generation. For scenario-specific requirements, control activation with compilation symbols or a custom switch. IVectoUINodePostProcessandVectoUIAssetBindeRuleare both applied during generation. Plan their responsibilities carefully to avoid conflicts.- Test and debug the workflow thoroughly. Report issues to the VectoUI support team to help improve the development experience.
Image Deduplication Tool
Available from version v0.7.0.
When artists design multiple UI screens, they often reuse common UI elements such as button backgrounds, Toggle styles, close buttons, and selection controls.
During UI generation, the editor therefore needs to detect whether an identical image has already been downloaded and used. When the image already exists in the project, VectoUI reuses the existing asset and references it from the current Image component.
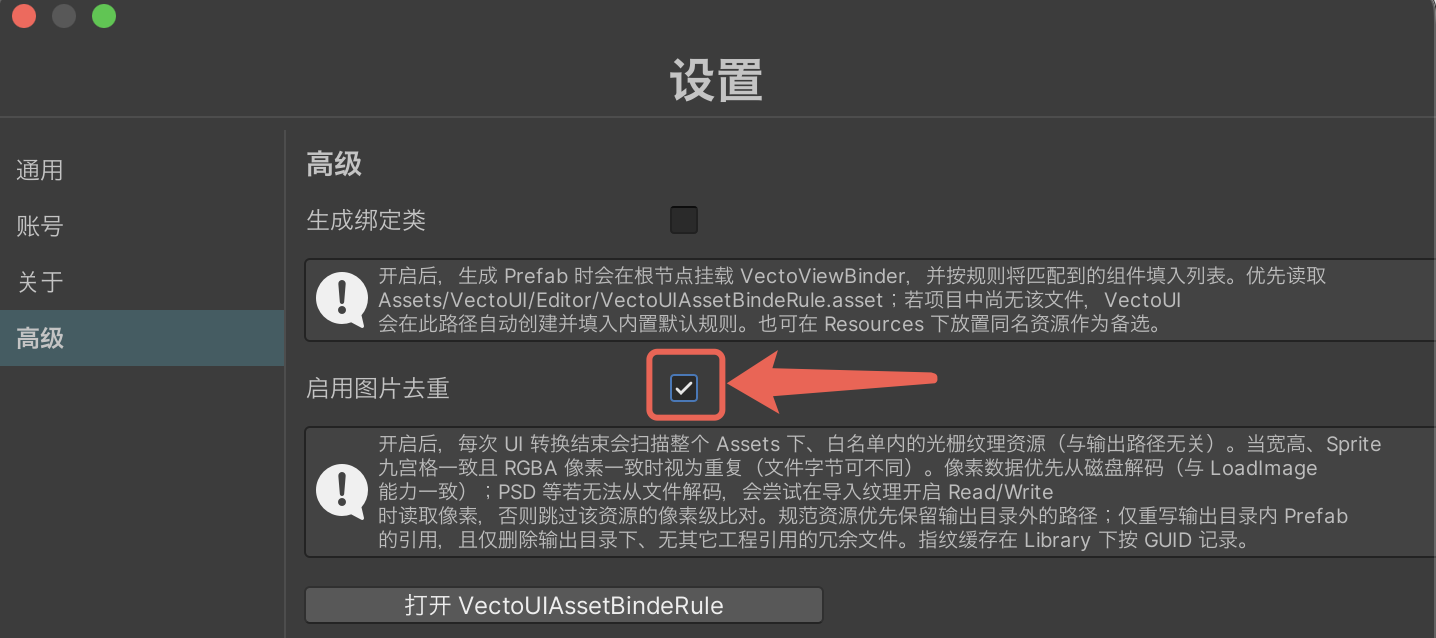
Note:
If a UI screen contains reusable art assets, UI screens generated later will reference the identical assets already stored under that earlier screen's resource path.
When multiple UI screens share a group of art assets, move those shared assets into a non-page-specific resource directory, such as Assets/Texture/UI/Common.
This allows the team to delete the resource folder of an obsolete UI screen without removing shared assets still referenced by other screens.
END